Do you want to add WooCommerce product tabs in WordPress?
With WordPress, you get a powerful eCommerce solution with WooCommerce. It even creates some default tabs for products like descriptions and reviews.
However, by default, you are not able to add custom tabs to the ones that already exist. You may want to add extra tabs like specifications, related posts, or even return policies. For that, you’ll need third-party solutions or plugins for this.
That’s why, in this step-by-step guide, we’ll show you the easiest way to add WooCommerce Products tabs in WordPress. Before we begin the tutorial, first of all, let’s be clear on why it is important to add product tabs in WooCommerce.
Why Add Product Tabs in WooCommerce?
Product Tabs is a more convenient way of adding extra information to your WooCommerce product pages in an organized manner.
If you run an online business, it is very important to keep customers informed about the products or services that you are selling. It is very common to see product tabs like images or descriptions, but there are cases where you need to add a demo video on how to use certain products.
Using custom tabs you can make your products or WooCommerce store more accessible to your customers. With the help of custom tabs, you can create tabs with much richer content like FAQs, usage guides, technical datasheets, etc.
So, having extra tabs on your product page is very beneficial to your eCommerce website as well as the customers who visit your site.
Now, let’s go ahead and see how to do that properly.
How to add WooCommerce Product Tabs in WordPress?
Today we are going to show you two easy methods to add WooCommerce product tabs in WordPress so that you can find your preferred way to complete the task.
Method 1: Add WooCommerce product tabs using a code
You can easily add WooCommerce product tabs programmatically if you have basic technical knowledge in programming.
But before we start, make sure to create a full backup of your site and use a child theme because we’ll be editing the most delicate files of your website.
Now you need to navigate to WP Admin Dashboard > Appearance > Theme Editor. From there go to the functions.php file.
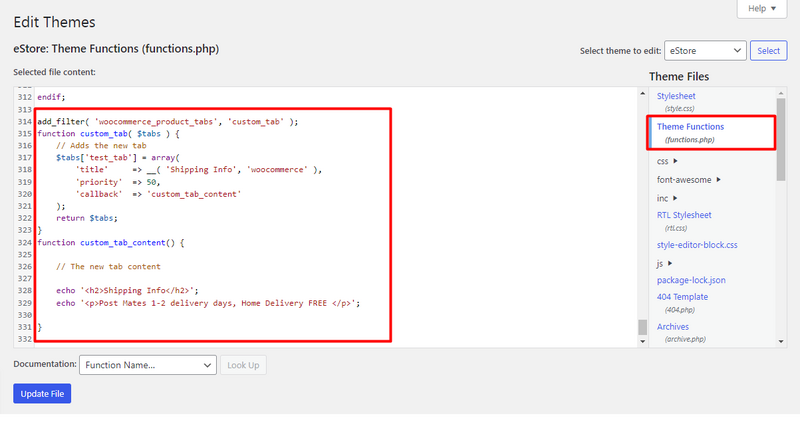
Use the following code snippet to add the product tabs. Here we have named the tab as ‘Shipping Option’. You can rename the tab according to your needs.
add_filter( 'woocommerce_product_tabs', 'custom_tab' );
function custom_tab( $tabs ) {
	// Adds the new tab
	$tabs['test_tab'] = array(
		'title' 	=> __( 'Shipping Info', 'woocommerce' ),
		'priority' 	=> 50,
		'callback' 	=> 'custom_tab_content'
	);
	return $tabs;
}
function custom_tab_content() {

	// The new tab content

	echo '<h2>Shipping Info</h2>';
	echo '<p>Post Mates 1-2 delivery days, Home Delivery FREE </p>';

}
Make sure to add the custom code at the end of the file and update it.
If you are not comfortable with changing the theme files directly on your own, you can use the second method where you can add custom product tabs using a plugin.
Method 2: Using a Plugin
For another method, we’ll be using the WooCommerce Product Tabs plugin. This plugin has 6,000+ active installations with 5-star reviews from its users. This plugin is totally free and also has a premium version with advanced features.
WooCommerce Product Tabs is the perfect plugin to add WooCommerce product tabs on your product detail page. Not only that, but this plugin also supports shortcodes so you can easily add forms and other embedded codes making your product more descriptive.
Key Features of WooCommerce Product Tabs:
- No limitation on the number of tabs
- Supports embedded codes and shortcodes
- Change the order of the tab according to the priority
- Define common tab for all products
- Assign tabs to a certain category or product
- Customize tabs appearance
Installing WooCommerce Product Tabs Plugin
So, to continue with the demonstration, we’ll be required to install the WooCommerce Product Tabs plugin onto your website. First of all, let’s see how we can install both free and premium versions of the plugin.
Install Free Version
WooCommerce Product Tabs is a freemium plugin hence you can install the plugin directly from your WordPress dashboard. Simply go to the Plugin>Add New from the sidebar of the dashboard.
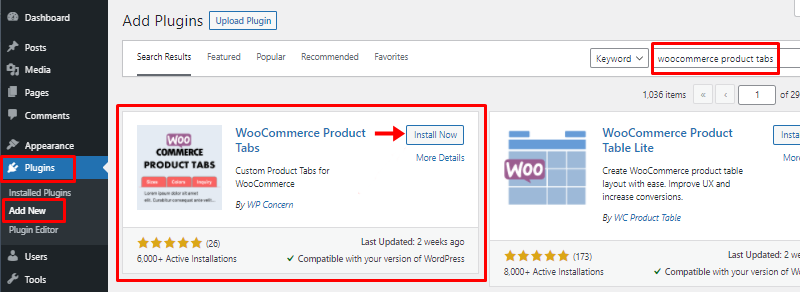
Then, search for WooCommerce Product Tabs in the search bar. Few results will be displayed. You should click on this:
Once the plugin is installed make sure to activate it too.
Install Premium Version
To install the premium version, visit the official homepage of the WPConcern plugin page. You can find several other products along with the WooCommerce Product Tabs plugin. If you click on the plugin it’ll lead you to the detail page where you can find documentation, reviews, and other information related to the plugin.
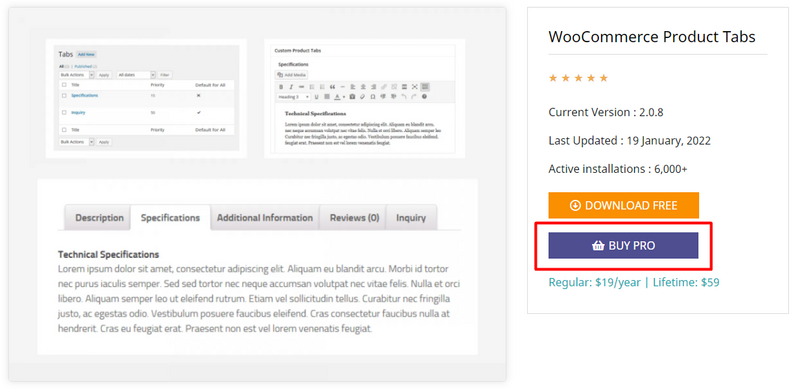
If you scroll further, you can see the pricing right below the BUY PRO button. The Premium version of this costs $19.99/year but if you wish to purchase it for a lifetime then the price is $59.99.
After you click it, you’ll see a purchase form where you need to enter your personal information and payment information.
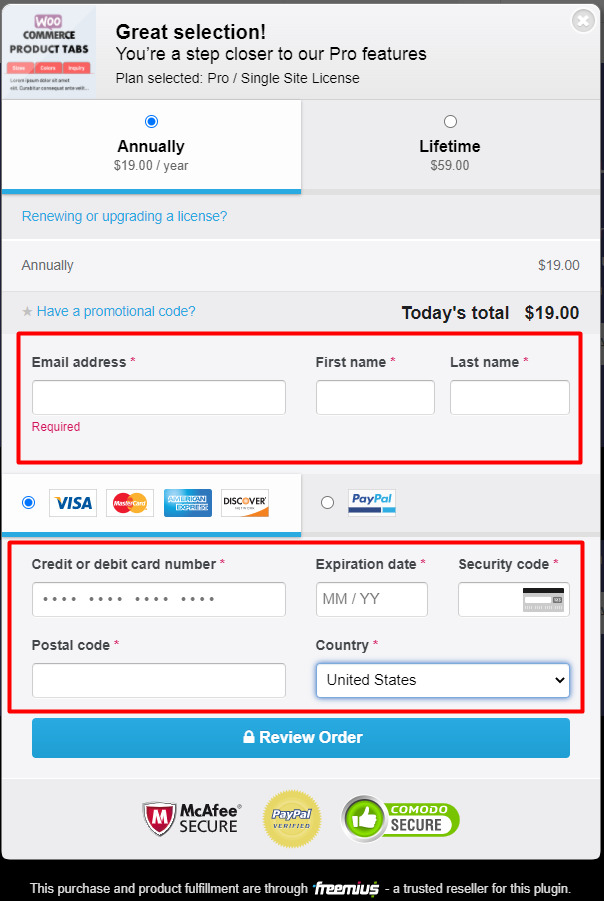
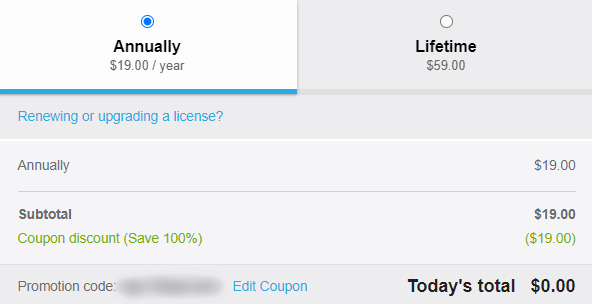
Also, if you have a promotional code you can add that too for up to a 100% discount.
Once you have entered the detail in the form simply click pay and subscribe.
Then after a while, you’ll receive an email from WPConcern where you can find all the necessary details to install and activate the plugin. You can find the pro version package, license key, and also some guides to help you through the activation process.

Next, you can click on the download link from the email and the plugin will be downloaded as a zip file on your computer.
To install and activate the plugin first go to Plugins >> Add New. On the top left side of the interface, you can see the “Upload Plugin” button. Click on it and choose the file you downloaded before from the email. After you upload, click on the “Install Now” button and then activate it by clicking on the “Activate” button.
Soon after that, you’ll be asked for the license key that you get after purchasing a pro-version of the WooCommerce Product Tabs plugin. Once you enter it, click on Agree and Activate License.
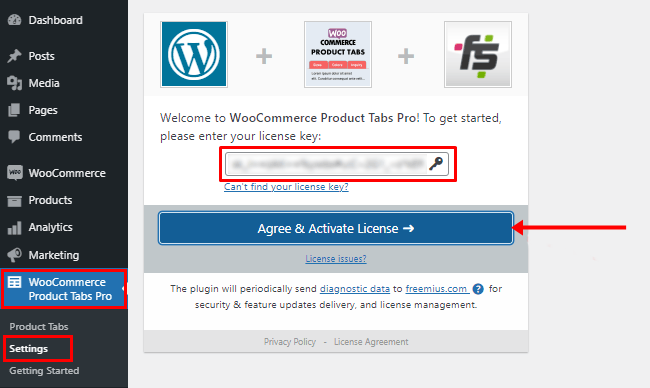
Now, you can start adding custom WooCommerce tabs to your website.
Note: For detailed information, make sure to go through our easy tutorial on the plugin installation.
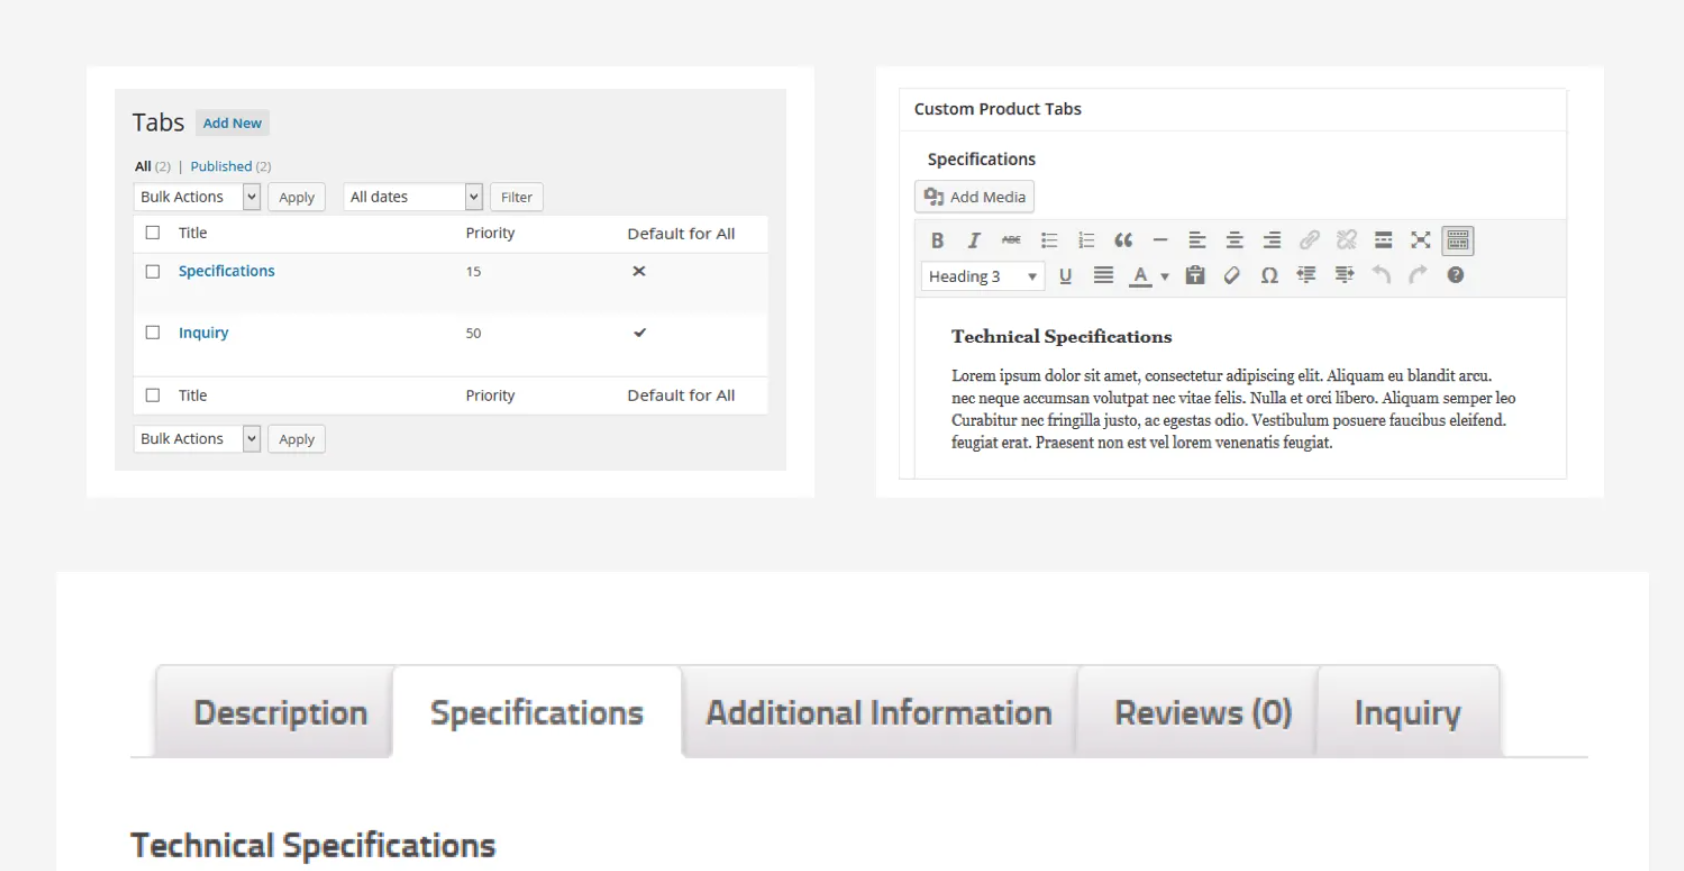
Add Custom WooCommerce Product Tab
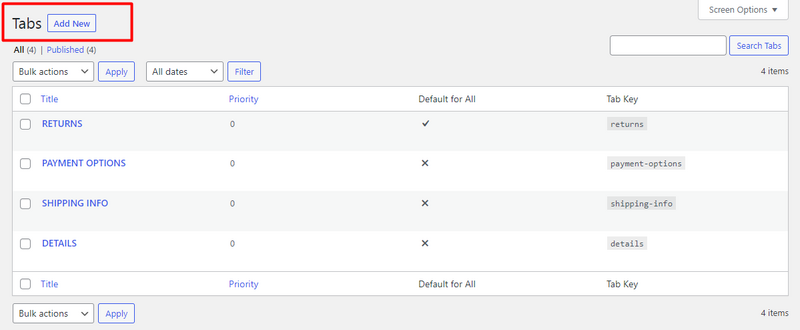
Once the plugin has been installed and activated, move ahead and open its UI page by navigating through the Admin dashboard. To do this, simply click on the WooCommerce Product Tabs Pro on your WordPress admin sidebar.
If you’re using the free version then you’ll find WooCommerce Product Tabs.
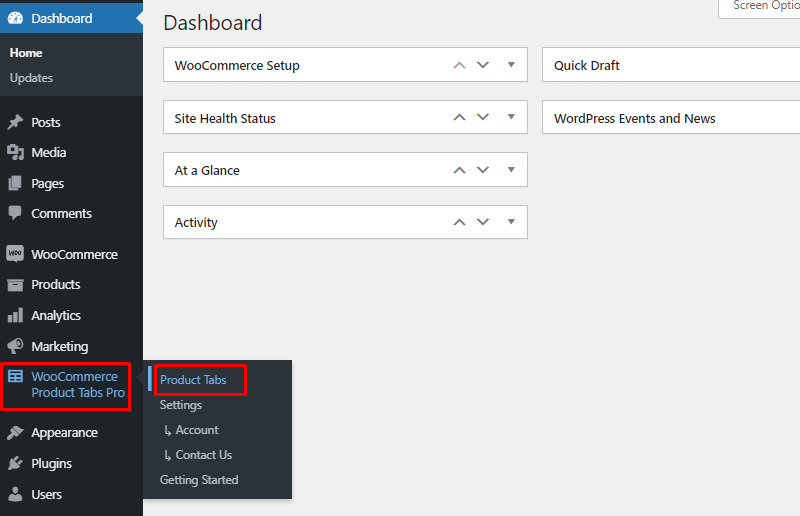
Then create a new tab by clicking on the “Add New” button. This will lead you to an interface to create a new customized product tab.
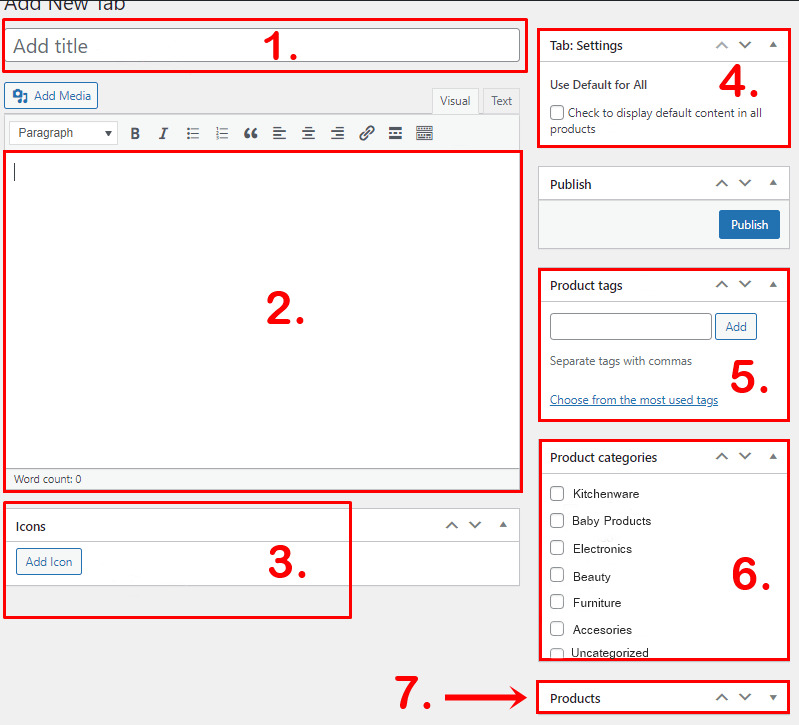
On the same interface, you can edit your product tabs by following things:
- Title – Add a name to the tab.
- Description – Add content to the tab like text, image, shortcode, links, HTML embeds, etc.
- Icon – Select an icon
- Select Default Content – Let you display the same content for all of the products.
- Enter Product tags – Add tag name
- Assign the Tab to Categories – This allows the product to display on selected categories
- Assign the Tab to Products – This allows you to select certain products to display in the tab.
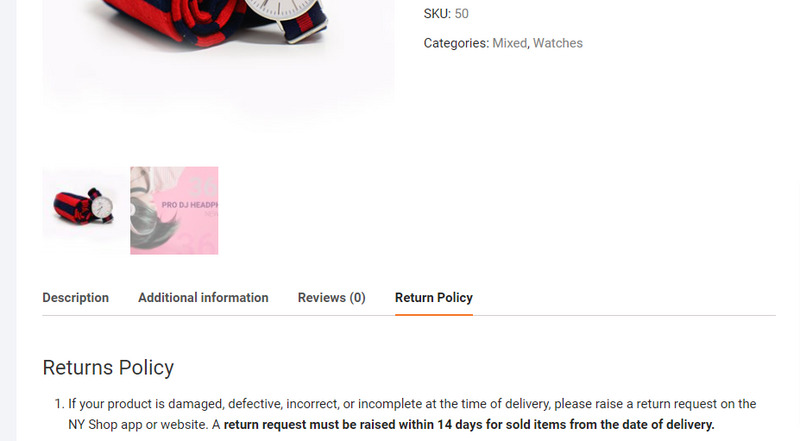
After you have added the title, content edit the rest of the elements according to your preferences. This is what your product tabs may look like:
Settings for Customizing Product Tabs
Next, for the setting, you can find a very easy adjustment section. There are 6 major customizations options for both defaults as well as custom tabs.
Simply open your dashboard, go to WooCommerce Product Tabs > Settings. You have advanced customization options like:
Reorder Tabs
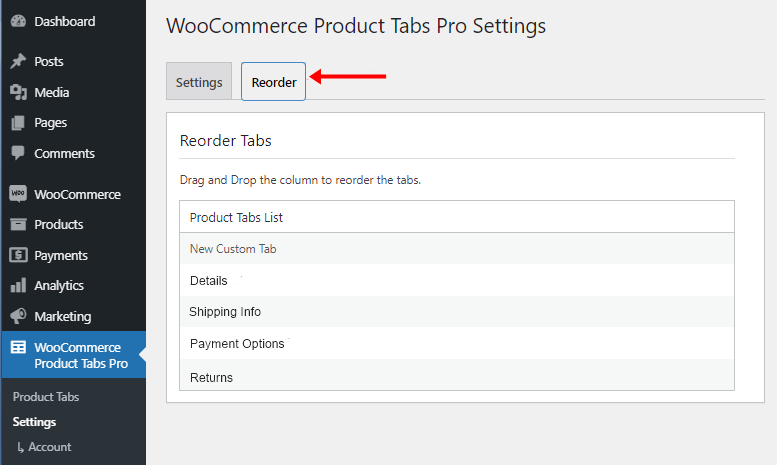
Reorder Tabs can be used to arrange the products tabs according to the way you want. You can arrange both default tabs as well as custom tabs.
Rename Tabs
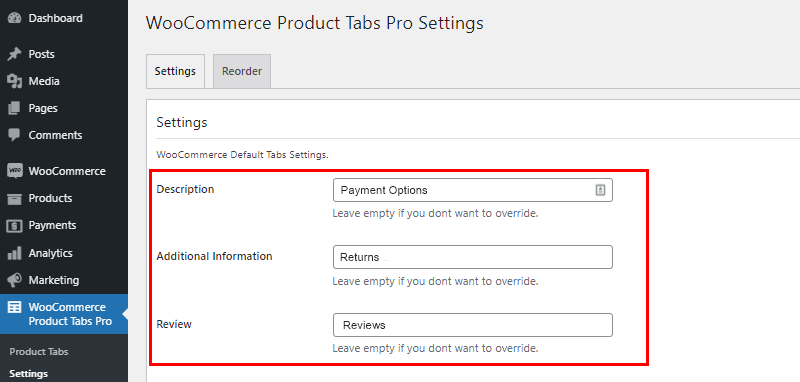
In this option, you can rename the default tabs to any name. This renames all of the tabs at once.
Search Products Using Tabs
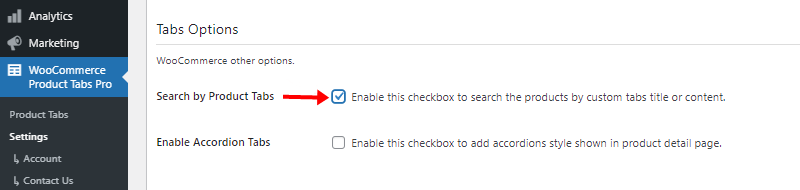
One of the features that allow you to search for the products using the keywords. To apply the changes, you just have to check the box.
Hide Tabs
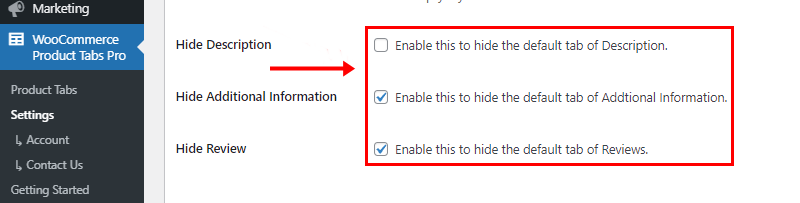
If you are familiar with WooCoomerce, it doesn’t allow you to hide the tabs. This option lets you do so by simply checking the box to hide the tabs.
Icon Options
Icon option is another awesome setting included in this that helps you to add the icon for the default tabs. It consists of various icon options to choose from.
Accordion Tabs
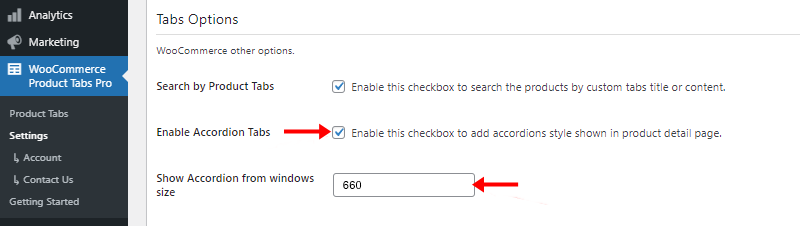
Next, you can either enable or disable the tabs to display as an accordion. Like we did for other options, you can just tick the checkbox to enable the tabs or leave it as it is to disable the tabs. Not only that, but you can also set your desired screen size to display the accordion.
Alternatives of WooCommerce Products Tabs
As we saw how easily we can add product tabs in WooCommerce. Similarly, there are other alternatives for the WooCommerce Product Tabs plugin available on the market.
So, let’s take a look at some of the best alternatives for WooCommerce Product Tabs in this section.
WooCommerce Tab Manager
WooCommerce Tab Manager is the best solution to add custom product tabs for any online store. If you already own a WooCommerce site, then you can use this plugin to create fully functional products tabs in minutes.
With its easy drag and drop interface, you have full control over the design of your product page tabs. This plugin is designed to fit the needs of different users from a newbie to a tech-savvy person. There are no restrictions to the number of tabs you want to create on your product page.
Another reason why this plugin is the best alternative is that you can get your money back within 30 days if you don’t like the plugin. You can purchase this plugin for $99 per year.
Custom Product Tabs for WooCommerce
Custom Product Tabs for WooCommerce is a freemium plugin with an affordable pricing range. You can purchase this plugin with the license for one site at $29.99/year.
With this plugin, you can easily create, delete and arrange custom tabs for products. Not only that, but you can also remove the default WooCommerce tabs without needing a filter.
What’s more, the plugin lets your standard site search and search widget connect with custom product tabs data which makes it easier for the customers to locate a product easily. It also has some awesome support form that can be accessed directly from your dashboard.
WooCommerce Ultimate Tabs
Living up to its name, WooCommerce Ultimate Tabs is the ultimate solution to manage product tabs on your site. The advantage of using WooCommerce Ultimate Tabs as a WooCommerce Product Tabs alternative is that you’ll get access to advanced features which is hard to find on other plugins.
Even if you’re not good at coding, you can easily create, reorder, rename and even disable tabs. Plus, it offers a long list of features like configuring the columns related to product call back, limiting the number of products to be displayed, and many more.
Moreover, this plugin supports multiple languages and you can get full access to these features by purchasing the plugin for $29/year.
Conclusion
That’s all for our tutorial on adding product tabs on WooCommerce.
By using any of the methods and alternatives you can easily add WooCommerce product tabs in WordPress. The point of adding such tabs is to make the product as informative as possible. This allows users to purchase a product with additional information.
Go ahead and let us know about your experience with using the plugin.
Moreover, if you find confusion in any of the above steps, you can comment about your question, and we’ll try our best to help you with our abilities.
You can also check the Scrollsequence article if you want to add animation in your WordPress website.
Follow me in Twitter for more updates related to WordPress.
Leave a Reply