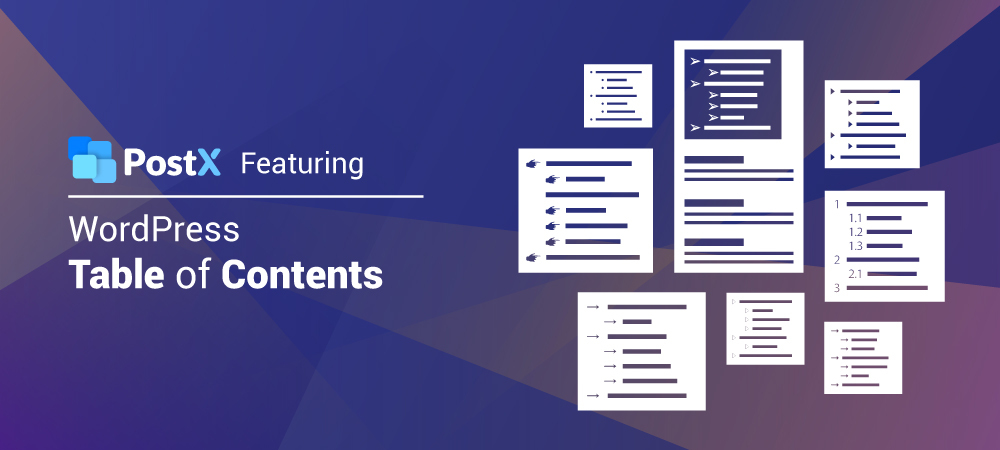
Reading through a large text or blog post is difficult, but adding a table of contents makes it a lot easier by simply skipping the other information to get to the parts that are really important to the readers. In this article, we’ll show you how to add a table of contents in WordPress using the ‘PostX table of content block’.
Since many of us use the WordPress platform to create a website, there are times when we do not have the time or skill to create the table of contents from scratch. That’s why we have come up with this article as a solution, which helps you add a table of content simply through a block that makes things easy with no coding or additional hassle.
Why Add a Table of Content Block?
A table of content helps readers to easily navigate to the section of information that they might be looking for whether it’s long, extensive blog posts or short articles.
And this is exactly where user-friendliness comes into play thanks to the table of contents. The table of contents not only shows the reader the content of the blog article in a structured way but also enables the reader to navigate this content in a targeted manner.
However, the table of contents in a blog post does not only help the reader. It also helps our site to rank well in search engines like Google because Google extracts the information from a table of content and displays them as a snippet. So searchers can, if they want, as well as understand it, jump directly from the search result to the desired place in the blog article.
Incidentally, a good user experience is a ranking factor for Google. It is particularly advantageous to include a table of contents in our content and blog posts.
Introducing Table of Contents Block in PostX
PostX is a Gutenberg post block WordPress plugin that lets you display your blog posts in different styles like grid, slider, and lists. Currently, this plugin contains 19 major blocks which will be automatically added once you install and activate the plugin. Some of them are:
- Post List
- Post Slider
- Post Grid
- Header
- Wrapper
- Taxonomy
- Image
- Post Module
- Table of Content
Among them, a newly added block is ‘Table of Content’ where you can choose 8 different layouts for TOC and then adapt them to your wishes.
If you are using a free version of this plugin then you won’t be able to access all of the layouts.
Note: You can check this detailed review article of the PostX plugin for more information.
How to Create a Table of Content on your Post or Page using PostX
PostX ‘Table of Content’ block is an easy way to add a table of content to your site that automatically creates the content based on the order of the heading tags in your content. See the demos of PostX Table of Content here.
First of all, you need to install the PostX plugin. PostX has both free and premium versions. You can install the free version from the WordPress repository while you can purchase the premium version from the official WPXPO website.
Note: Check the pricing of the PostX Plugin
Install PostX Plugin
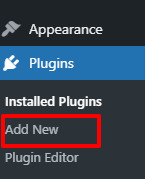
The process of installing the plugin is very simple and just takes few minutes. To do so, navigate to the WordPress admin dashboard by going to Plugins>>Add New.
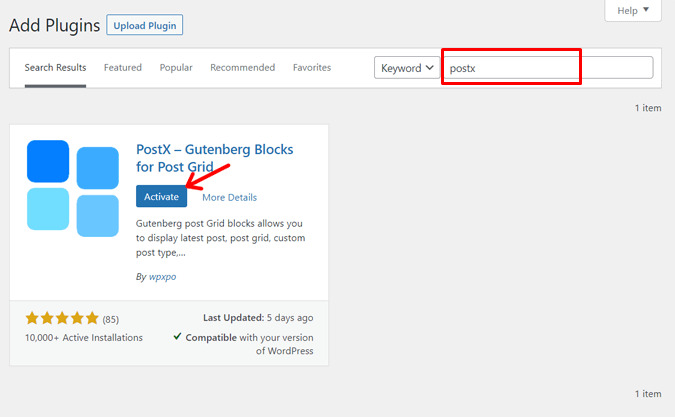
Look for a plugin PostX, then click the Install Now button then click Activate.
To install the pro version of this plugin, you can go through this article.
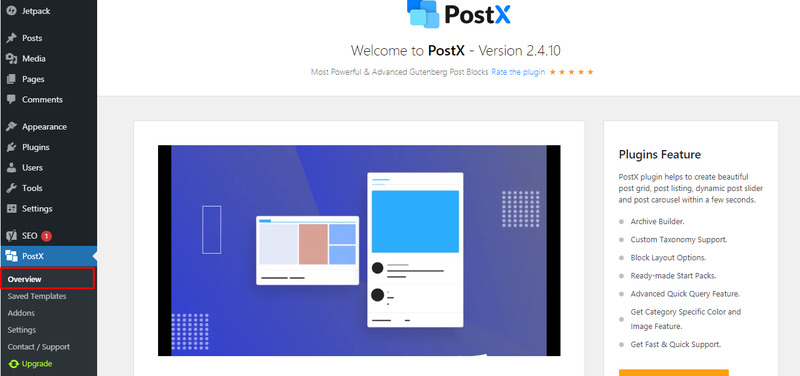
Once the plugin has been installed, you can find the plugin on the left-hand side of your WordPress Dashboard. You can find more information about the plugin in the overview section.
Enable Table of Content Addon
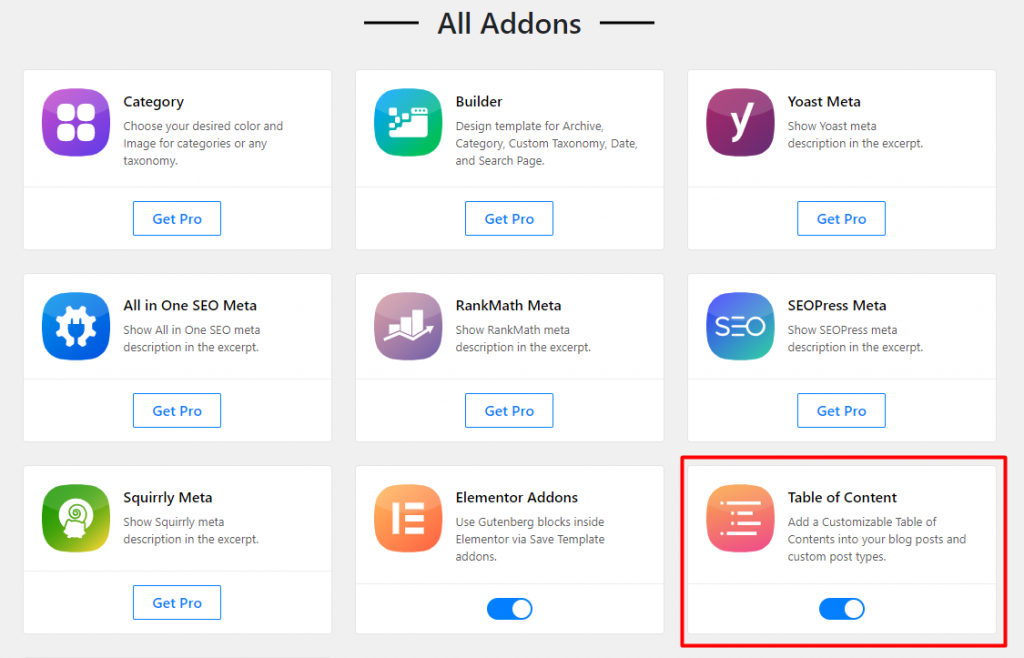
After activating the plugin, you have to enable the table of content addons first. (If it is not enabled by default). Once after enabling that addon, you will get a custom block for a table of content in the post/page editor.
To enable it,
- Go to PostX menu in admin panel
- Then go to Addons
- See the Table of Content block and enable it.
Add PostX Table of Content Block to any Post or Page
Now that the PostX plugin is installed and ready to go, you can easily add a table of contents block to a post or page. As we mentioned earlier all of the blocks will be automatically added as soon you activate the plugin. In case if you do not want all of the blocks then you can simply enable or disable the blocks through settings.
Now, to add the PostX Table of Content block, you need to go to your desired post or page. You can just add the block by clicking the (+) icon to insert a block, exactly the way we do in Gutenberg editor.
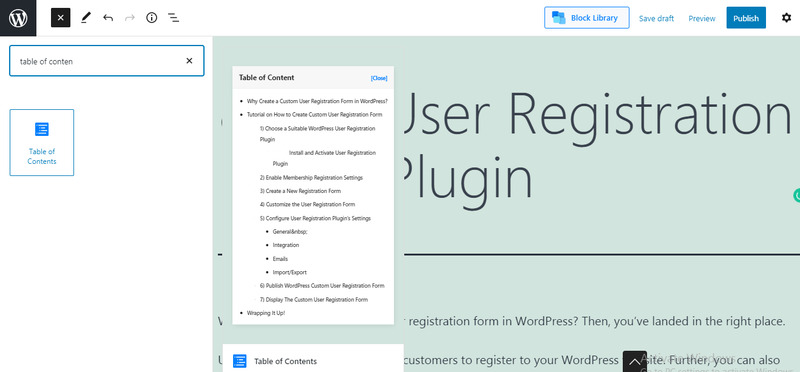
A drop-down will show up with all your available blocks. Scroll down to the “PostX Blocks” section or simply type “Table of Contents”. Click on the block to add it to your desired post or page.
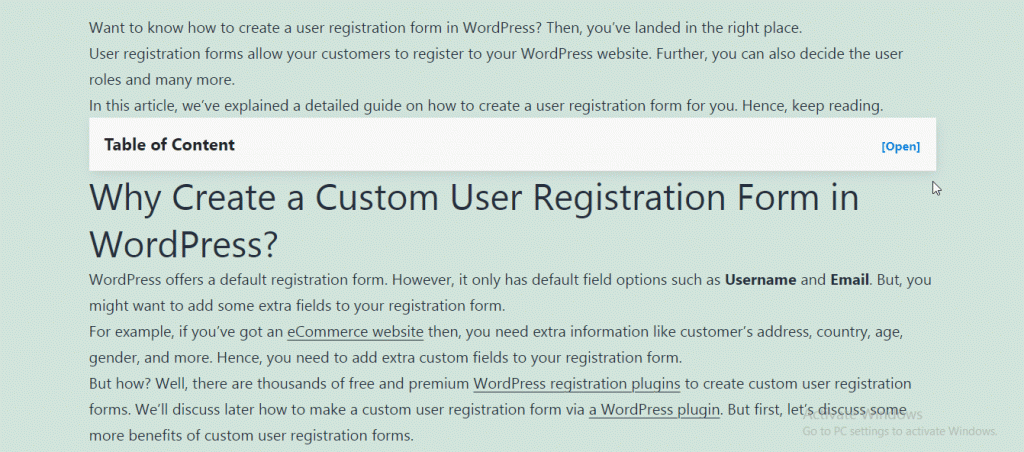
That’s it! You have successfully added a table of contents Gutenberg block into your post or page. Now all you need to do is edit and build the table of content that suits your content.
Customize Table of Content Block with Block Settings
After adding the TOC block, you can leave it as it is or you can check out other layouts and add those layouts to your blog.
TOC block has various settings where you can change colors or other design-related elements. The setting panel is very simple and clear, so you won’t have any confusion while styling your table of content.
The plugin lets you set up the following settings:
- Layout
- Change hierarchical order
- Color
- Typography
- Enable/Disable Sticky Table
- Responsiveness
- Custom CSS
i) Change Layout of Table of Content
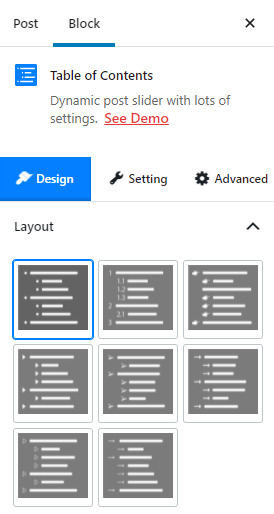
You can find various layouts options in the ‘Table of Content’ block of the PostX plugin. To change the default layout, you need to go on the left-hand side of your editor and click on the “Design” option.
After that you can see that 8 different layouts are available. 2 layouts are available for free users while 6 remaining layouts can be unlocked by upgrading to the pro version. You can also see the demo of all the layouts if you scroll the page or you can go to the Demo page to preview those layouts in a better way.
ii) Change Hierarchical Order

Table of Contents is automatically displayed by identifying the headings and subheadings(H1, H2, H3) of the content. A table of contents creates links for each heading section, allowing you to navigate to different parts of your document. If you do not want to display or remove a particular heading from the Table of content then you can do that from the setting option. Right beside the design option, you can find the Setting option.
Click on the ‘Setting’ option, you’ll find various other options for customization. But we need to click on ‘General’. Now you’ll get dropdown menu items where you can see a box that contains a Heading tag. Thereafter, you can remove or add the heading tag.
Not only that, you can enable and disable other settings like collapsible TOC and enable back to top. Simply toggle the button to enable the settings and this is the result you get.
iii) Change Font and Background Color
With this customization option, you can change the default color of the top bar to any color of your choice.
Below the ‘General’ setting, you can find the ‘Heading’ option. Select color and choose the color while live previewing the changes.
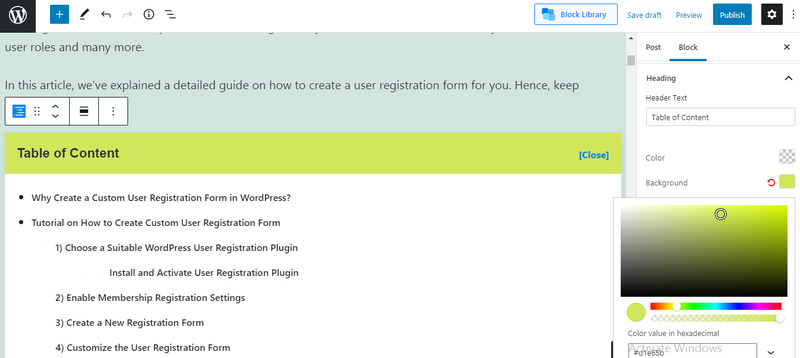
You can also change the top bar background color of your table of content for that vivid look.
iv) Change Typography
There might be a situation where the Table of Content doesn’t match with the rest of your blog. So for that easy that, typography comes to the rescue. You can change the font, font size, and even font style.
You can find the settings on the Heading option where we earlier changed the font and background color. Navigate to Heading>>Typography. You’ll see more than 500 fonts to choose from, isn’t it exciting?
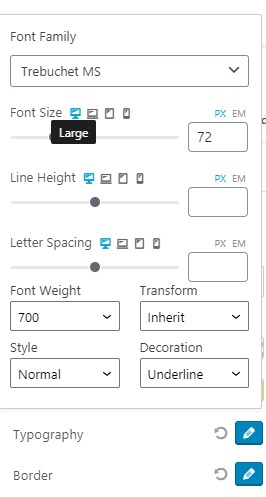
Furthermore, you can increase or decrease the font size and change the style of your fonts from italic, oblique to uppercase. If that’s not enough, you can make more changes by decorating your font. Yes, you heard that right, you can decorate your font by underlining, overlining, and lining through the text.
v) Sticky Table of Content
PostX table of the content block has the sticky option as well. You can make the TOC sticky and change the position to left, right, and center.
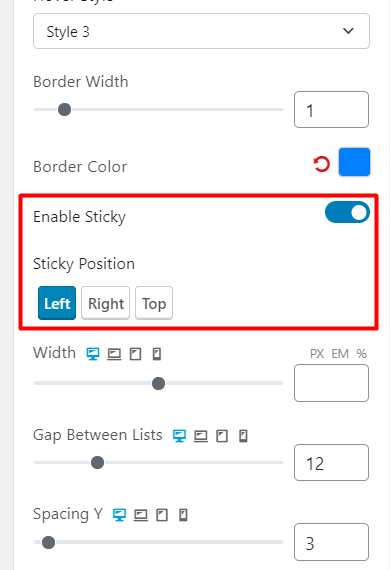
From the setting tab and list body section, you can enable sticky.
vi) Go to Top Option
With the go-to top option, you can add a go-to top arrow to your site easily. If you scroll down, you can see an arrow and that is added with this plugin.
Final Thoughts
As you can see from this article, a table of contents is beneficial for you as well as the users of your website. The sooner you implement a table of contents for your WordPress posts and pages, the better.
Visitor numbers are likely to increase and potentially become returning customers. Meanwhile, the health of your entire website can be improved too. Less bounce rate, better SEO ranks, and happier customers await you when you make a table of contents a constant on your web pages.
There are other methods to create a table of contents from the scratch but it required a lot of steps that might not be so beginner-friendly. Also, there are plugins to get the job done, but adding lots of plugins to your site causes extra load. Meanwhile, the PostX plugin is super lightweight and contains so many other blocks to create an amazing WordPress blog.
Creating a table of contents from scratch has never been easier and it is up to you to take advantage of a PostX table of content block.
Also, follow me on Twitter for more related articles.
Leave a Reply